Have you ever wondered how does your machine to turn itself off headlights, in case of low light? Simple, we'll find out today! To detect the amount of light on the environment, the machine uses a sensor called photoresistor, let us see how it is done.

In this tutorial we will take care of reading values from a photoresistor or a light sensor. Our ultimate goal is to turn on an LED reading sensor values. So if the room in which we find ourselves is this little light the LED lights up, otherwise, it will remain off.
Photoresistor
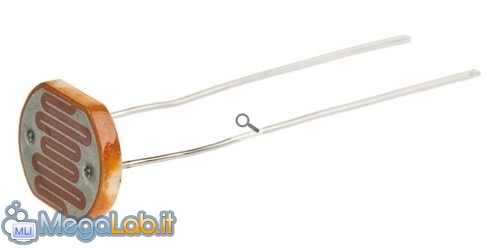
The photoresistor is a terminal circuit element has a resistance able to vary its capacity depending on the light that strikes it.
Sketch
# Define photoresistor A0 # define LED 12 void setup () {pinMode (A0, INPUT); pinMode (12, OUTPUT); Serial.begin (9600); / / Initialize the serial communication} void loop () {int val = analogRead (photoresistor) / / save the value in the variable val photocell Serial.println (val, DEC); / / write the value of the photoresistor, expressed in decimal numbers if (val <800) / / if the value read by photocell ( brightness) is low, turn on the LED digitalWrite (LED, HIGH); else digitalWrite (LED, LOW); / / otherwise turn it off (or leave it off)}
Circuit
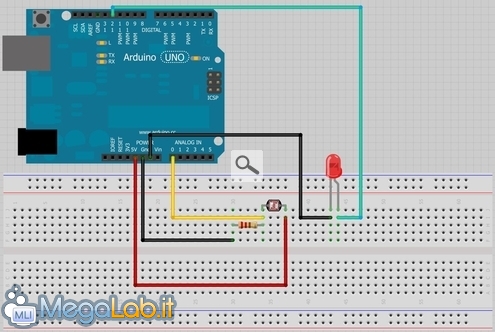
Well, if everything is done correctly, we should be able to see our LED light in low light conditions, and then goes off (almost instantly) in the case of normal brightness or high. Obviously if the brightness value set by us does not meet your expectations, you can change it by setting another within the sketch.
See you next tutorial!
See Pictures and Read more : Getting Started with Arduino: control a LED by photoresistance
ไม่มีความคิดเห็น:
แสดงความคิดเห็น