Brief Introduction to Steam, Valve's platform that allows you to keep all of our digital library of PC titles under control and save with discounts on several titles.

One of the first things you can do, after knowing the basics of coupon development is undoubtedly the transfer of data to and from Arduino.
The serial monitor
First of all, let's get familiar with the interface: the Arduino software provides, by default, what is called "serial monitor", which is activated by the icon shown in the image.
Once clicked the icon, you should see a window like this. This is what it looks like the serial monitor:
Let's light the fires!
Well, to begin we must first sketch loaded into the microcontroller. To do this, copy the code below into the Arduino IDE and will perform the upload.
The sketch
# Define LED 12 / / set the variable LED on digital pin 12 int val = 0; / / use the variable val to save the values from keyboard int status = 0; / / use the state variable to save the state in which is the led. 0 = off, 1 = on void setup () {pinMode (LED, OUTPUT); / / set the LED pin (12) as output Serial.begin (9600);} void loop () {val = Serial.read ( ) / / read the value from the keyboard and save / / check that the input is the letter a / / and if it is, change the status of the LED if (val == 'a') {state = 1 - state;} if (status == 1) {digitalWrite (LED, HIGH); / / turn on the LED} else {digitalWrite (LED, LOW); / / turn off the LED}}
We realize the circuit
Once you upload the sketch, you just have to make the proper connections. In our case we will use a LED to display the result of our keyboard input. To connect a LED, simply keep an eye on the cathode and the anode (shown in figure). The anode is, in fact, the longer terminal, which indicates the positive pole (in the circuit indicated with the thread of color red) while the cathode, shorter, represents the negative pole.
NB in the case where it is not possible to identify the polarity of the LED because the cathode and anode have the same length, just pay attention to the notch on the bulb of the LED; it indicates, in the part in which it is positioned, the cathode, namely the negative (black wire in the diagram).
View breadboard
The connections are completed, we can only test the operation of the circuit. To do this, open the console (as shown above), we write inside the text the letter a and press ENTER. If the circuit is set up properly, we should be able to see the LED. To turn it off, just rewrite the same letter in the console and the LED should turn off.
Well, our tutorial ends here. See you next!
If you are a PC gamer you certainly heard of Steam, Valve's platform known (the production company of Half-Life, for instance) activated in 2003. Available for Windows, Mac and Linux (in beta for the latter), Steam allows you to buy and manage thousands of titles in digital format.
Installation and account creation
Create an account and installing Steam is very simple. Log on to the official website by clicking here and click on access in the top right. At this point you'll see a login page, then press Log in Steam.
Now I have to do is go back to the main page and download it from the link at the top right, install it and go with your account.
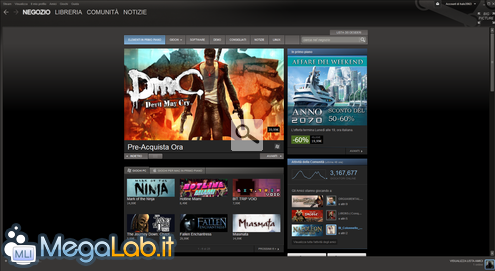
Shop
The first card is the Steam Store. From here you can buy thousands of titles divided into categories and a very attractive price, it often (especially in the final period well, such as Christmas, summer etc ...) Steam is very substantial discounts, even the 50/75% on titles made available.
I would like to point out that you can buy from Steam Indie Games (then made by independent developers) and FreeToPlay, that is free. You can find them in the appropriate sections.
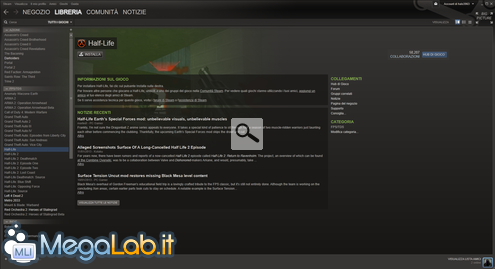
Library
The second tab is the most important of Steam Library. From here you can manage all the titles that you have purchased, or activated on Steam and install them. Obviously it's all about Steam digital version, you will not have the box or instruction manual on hand, you simply download and install the game that interests you most.
Steam also will always keep your game up to date, saving you quite a bit 'of effort and time that you would have lost instead to install patches and whatnot.
As you can see from the image you can create sections for cataloging and finding the right games.
In addition to the games, Steam has recently opened a section for programs. For now, however, is not well-provided you can find interesting software, especially video and photo editing, these are often discounted.
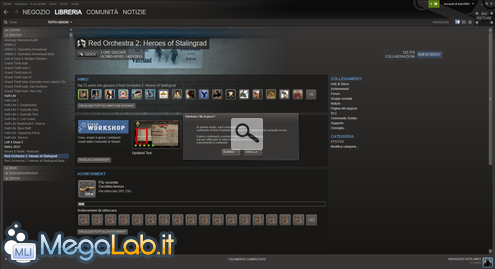
Installing a game
Installing a game via Steam is very simple. First you need to go to the store and look for the game that interests us.
Once this is done we will have a whole range of information on the game itself, such as trailers, photos, and other minimum requirements. We will show the price and next to this there will be written Add to cart that we will need to buy the game. The games can be purchased with PayPal, credit card and postpaid. At this point, all that remains is to look for our game in the library, do Right and install game.
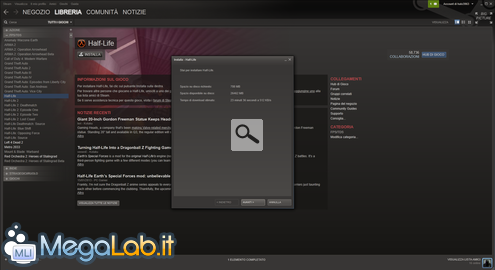
Uninstalling a game
Uninstall a game of Steam is very simple. Simply select the game in the library that we want to remove, click Right and press delete local content. In a few minutes Steam will remove the game from your hard disk. I should note that the game will remain in the library to be reinstalled maybe later.
See Pictures and Read more : Steam: manage their PC titles and save
ไม่มีความคิดเห็น:
แสดงความคิดเห็น